Table of Contents
ToggleFew things feel worse than settling in for a gaming session only to discover the console won’t power on. When a Nintendo Switch won’t charge, it’s not just an inconvenience, it’s a full stop on entertainment. The hybrid nature of Nintendo’s console means charging issues can stem from multiple sources: the dock, the USB-C port, the cable, or even the battery itself. Unlike traditional consoles that stay plugged in, the Switch’s portability adds complexity to its power management. This guide breaks down exactly why a Nintendo Switch won’t charge and provides tested solutions to get players back in the game. Whether it’s a quick fix or something deeper, understanding the problem is the first step to solving it.
Key Takeaways
- Identify why your Nintendo Switch won’t charge by testing three methods: docked, handheld with the official AC adapter, and handheld with a third-party USB-C charger to isolate the problem source.
- The most common culprits are faulty USB-C cables, incompatible or failed power adapters, dirty charging ports clogged with lint and debris, or issues with the dock itself.
- Perform a hard reset by holding the power button for 12-15 seconds, then clean the USB-C port with a toothpick or compressed air and test different power outlets and cables to troubleshoot basic issues.
- Deeply depleted batteries require 10-30 minutes of charging time before showing signs of life, so connect your Switch to the official adapter in a cool place and wait before attempting to power it on.
- After 3-5 years of regular use, lithium-ion batteries degrade and may prevent charging; battery replacement costs around $100 USD through Nintendo’s official service but is cheaper than replacing the entire console.
- Prevent future charging problems by unplugging cables by the connector (not the wire), keeping the dock stationary and clean, storing the Switch at 50-60% battery in moderate temperatures, and replacing worn cables every 6-12 months.
Understanding How the Nintendo Switch Charging System Works
The Nintendo Switch relies on USB-C Power Delivery (USB-PD) to charge, a protocol that negotiates power levels between the console and the charger. The original Switch and Switch OLED models accept up to 39W (15V/2.6A) when docked, while handheld mode typically draws 18W (15V/1.2A). The Switch Lite uses a slightly lower power profile since it lacks TV mode.
Nintendo’s official AC adapter (model HAC-002) is specifically tuned to these requirements. When plugged in, the adapter communicates with the Switch’s power management IC to deliver the correct voltage. Third-party chargers can work, but they must support the same USB-PD profiles, otherwise, the console may charge slowly or not at all.
The dock adds another layer. It doesn’t just pass power through: it actively manages the connection between the AC adapter, the Switch’s USB-C port, and the HDMI output. A faulty dock can block charging even when the cable and adapter are perfectly fine.
Battery health also plays a role. The Switch uses a lithium-ion battery (model HAC-003) rated at 4310mAh for the original model. Over time, batteries degrade, losing capacity and sometimes developing issues that prevent charging. The system includes safeguards to protect against overcharging and deep discharge, but these can sometimes trigger false positives that make the console appear dead.
Quick Diagnostics: Is Your Switch Really Not Charging?
Before diving into fixes, it’s worth confirming the problem. A Switch that appears dead might just be deeply discharged or stuck in a low-power state.
How to Check the Charging Indicator
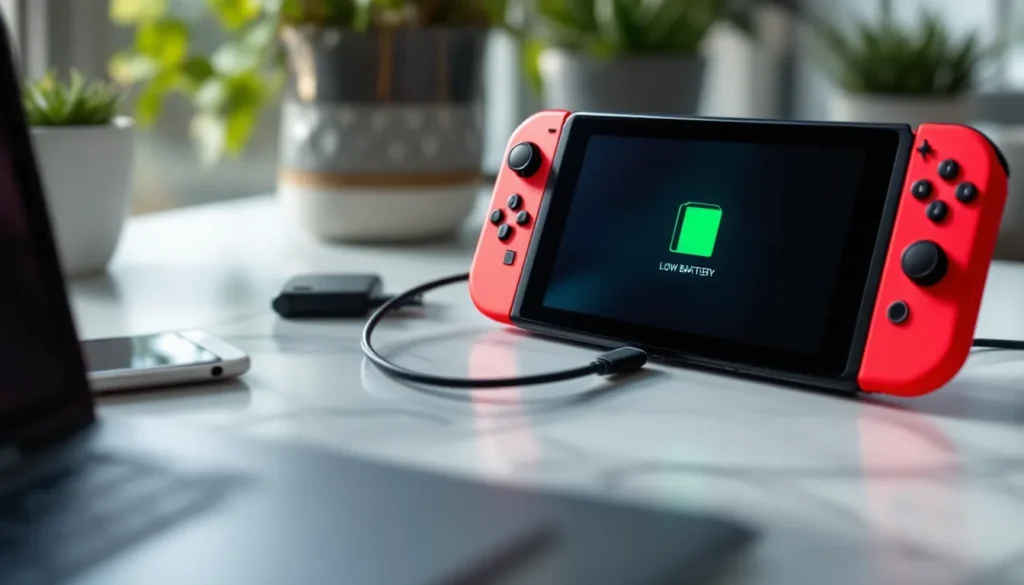
When connected to power, a green charging icon should appear in the top-right corner of the screen (if the console is on) or a battery icon with a lightning bolt should display briefly when the power button is pressed (if it’s off). If there’s no response at all after holding the power button for 12-15 seconds, the console might be completely drained.
The LED on the dock is another clue. It should light up when the AC adapter is connected, even without the Switch inserted. No light means the dock isn’t receiving power, either the outlet is dead, the cable is faulty, or the dock itself is damaged.
Testing Different Charging Methods
The Switch charges in three ways: docked, handheld with the AC adapter, and handheld with a third-party USB-C charger or power bank. Testing each method isolates the problem.
- Docked: Insert the Switch, check for the green light on the dock, and wait 30 seconds. If nothing happens, remove it and try handheld mode.
- Handheld with AC adapter: Plug the official charger directly into the Switch’s USB-C port. Skip the dock entirely. If it charges this way, the dock is the issue.
- Third-party charger: If available, try a USB-PD-compatible phone charger or power bank. If it works, the official adapter might be dead.
Sometimes a deeply depleted battery needs 10-15 minutes of charging before showing any signs of life. Players with proper Nintendo Switch techniques often catch charging issues early, but even seasoned users can run into battery drain surprises.
Most Common Reasons Your Nintendo Switch Won’t Charge
Charging failures usually trace back to a handful of culprits. Pinpointing the source makes troubleshooting faster.
Faulty or Incompatible Charging Cable
The USB-C cable that connects the AC adapter to the Switch (or the dock to the adapter) can fray, bend, or suffer internal wire breaks. Even a cable that looks fine externally might have damaged conductors inside. Not all USB-C cables support the same data and power standards, cheap cables from third-party sellers sometimes lack the wiring for USB-PD negotiation.
Nintendo’s cable is rated for the full 15V output. A standard USB-C cable might only support 5V, which won’t charge the Switch at a usable rate. Swapping cables is one of the easiest diagnostic steps.
Power Adapter Issues
The AC adapter itself can fail. Power surges, wear, or manufacturing defects can kill the internal components. If the adapter feels unusually hot, smells burnt, or shows no LED indicator on the dock, it’s likely toast.
Third-party adapters sometimes work initially but fail over time because they don’t fully comply with USB-PD specs. The Switch is pickier about power delivery than most devices, what works for a laptop or phone might not cut it here.
Dirty or Damaged Charging Port
The USB-C port on the bottom of the Switch is exposed whenever the console is in handheld mode. Lint, dust, and debris accumulate over months of use, creating a barrier between the cable and the port’s internal pins. Common maintenance tips recommend cleaning ports every few months, but most players forget until charging stops working.
Physical damage is another risk. Inserting the cable at an angle or yanking it out repeatedly can bend the pins inside the port. Once those pins are misaligned, the connection becomes unreliable or fails entirely.
Dock Connection Problems
The dock itself has a USB-C connector that mates with the Switch’s port. This connector can become loose, dirty, or damaged from repeated insertions. The dock’s internal circuit board can also fail, especially if it’s been knocked over, dropped, or exposed to liquid.
Some users report that the dock’s USB-C connector becomes slightly bent over time, preventing a solid connection. This is more common with older docks from 2017-2018 production runs.
Battery Drainage and Deep Sleep Mode
When a Switch sits unused for weeks with a low battery, it can enter a protective deep sleep mode. The system does this to prevent the lithium-ion battery from discharging below a safe threshold, which could cause permanent damage. In this state, the console won’t respond immediately to charging, it needs time to wake up.
In rare cases, the battery itself fails. After 3-5 years of regular use, lithium-ion cells lose capacity and can develop internal faults that prevent charging altogether. If the console is several years old and has seen heavy use, battery degradation is a real possibility.
Step-by-Step Troubleshooting Guide
This sequence moves from simplest to more involved fixes. Work through each step before moving to the next.
Perform a Hard Reset
A hard reset clears temporary software glitches that can interfere with power management. It’s non-destructive and takes seconds.
- Hold the power button for 12-15 seconds until the screen goes black.
- Wait 10 seconds, then press the power button again briefly to turn it back on.
- Check for the charging icon in the top-right corner.
This often resolves cases where the console appears frozen or unresponsive. It’s the gaming equivalent of turning it off and on again, boring, but effective.
Inspect and Clean the USB-C Port
Grab a flashlight and look inside the port on the bottom of the Switch. If there’s visible debris, use a wooden toothpick or a plastic dental pick to gently scrape it out. Avoid metal tools, they can short the pins or scratch the connector.
Compressed air can help, but don’t hold the can too close or upside-down (liquid propellant can damage electronics). A few short bursts from 6 inches away should dislodge loose particles.
If the port looks clean but charging is still inconsistent, the internal pins might be bent. This requires a closer inspection under good lighting. For players who carry their console in bags frequently, lint buildup is almost inevitable.
Try a Different Power Outlet and Cable
Plug the AC adapter into a different outlet, preferably one you know works, like where a phone charger is currently plugged in. Power strips and surge protectors can fail silently, cutting power to specific outlets.
Swap the USB-C cable if possible. If a friend has a Switch, borrow their cable for a quick test. If the console charges with a different cable, the original is faulty.
For those using third-party chargers, verify the specs. It should support 15V/2.6A or at least 15V/1.2A for handheld charging. Many phone chargers max out at 9V, which won’t charge the Switch effectively.
Test the Dock Separately
Connect the AC adapter directly to the Switch in handheld mode. If it charges, the dock is the problem. If it still won’t charge, the issue lies with the adapter, cable, or console itself.
Inspect the dock’s USB-C connector for damage or debris. Sometimes a piece of plastic from a case or skin gets lodged in the dock’s port, blocking the connection.
If the dock LED doesn’t light up when the adapter is plugged in (without the Switch inserted), the dock’s power circuit is dead. In that case, Nintendo Switch tools like replacement docks or diagnostic equipment can help verify the failure.
Allow Time for Depleted Battery Recovery
If the battery is completely drained, the console might not respond for 10-30 minutes after plugging in. This is normal behavior for deeply discharged lithium-ion batteries.
Leave the Switch connected to the official AC adapter in a cool, dry place. Don’t try to turn it on repeatedly, just let it charge undisturbed. After 15-20 minutes, press the power button once to check for the battery icon.
Players returning to their console after a long break, say, after finishing a big release and shelving it for months, often encounter this. The battery protection circuit needs time to confirm the cell is stable before allowing a full charge.
Advanced Fixes for Persistent Charging Problems
When basic troubleshooting doesn’t work, the issue might be software-related, involve incompatible accessories, or require hardware intervention.
Addressing Software and Firmware Issues
Corrupted system files or outdated firmware can interfere with power management. If the console turns on but won’t charge, try updating the system software.
- Go to System Settings > System > System Update.
- If an update is available, download and install it while connected to power (if possible) or use any remaining battery.
- Restart the console after updating.
In rare cases, a failed system update can brick the charging function. If the console was interrupted during an update, power loss, forced shutdown, etc., it might need a factory reset or recovery mode intervention. That’s beyond typical user fixes and usually requires professional repair guidance.
Dealing with Third-Party Accessory Incompatibility
Not all USB-C chargers play nice with the Switch. Some brands (especially fast-charging phone adapters) use proprietary power profiles that confuse the Switch’s negotiation protocol. The console might refuse to charge, charge intermittently, or charge at a trickle rate.
Stick to chargers that explicitly list USB Power Delivery (USB-PD) support and offer 15V output. Anker, RAVPower, and other reputable brands make compatible chargers, but always verify specs before buying.
Docks are another minefield. Third-party docks have been known to brick consoles, especially older models from 2017-2019. Nintendo issued warnings about this, and while some brands have improved, the safest route is still the official dock. If a third-party dock is in use and charging issues began after switching to it, revert to the official hardware.
When to Consider Battery Replacement
If the console is 3+ years old, charges sporadically, or drains faster than it used to, the battery might be near the end of its lifespan. Lithium-ion cells degrade with charge cycles, after 500-1000 full cycles, capacity drops noticeably.
Battery replacement isn’t a DIY job for most players. The Switch’s battery is glued in place and requires disassembly of the console, including removal of the rear shell, disconnecting ribbon cables, and handling delicate components. It’s doable with the right tools and patience, but one slip can damage the motherboard or screen.
Third-party repair shops and Nintendo’s official service both offer battery replacement. The official route costs around $100 USD (as of 2026), but it includes a warranty. Third-party shops may charge less but come with variable quality.
How to Prevent Future Nintendo Switch Charging Issues
A little maintenance goes a long way in avoiding charging headaches.
Best Practices for Cable and Dock Maintenance
Cables fail when they’re bent at sharp angles or wrapped too tightly. Always unplug by gripping the connector, not the cable itself. When storing the AC adapter, loop it loosely, avoid wrapping it around the brick, which stresses the wire at the connection point.
Keep the dock clean and stationary. Moving it frequently increases wear on the internal USB-C connector. If dust accumulates on the dock’s port, use compressed air every few months to clear it out.
Inspect cables every 6-12 months for fraying or kinks. Replacing a $10 cable is cheaper than dealing with a dead console. Many players who follow essential Switch care routines report fewer hardware issues over time.
Proper Storage and Temperature Control
Lithium-ion batteries hate extreme temperatures. Leaving a Switch in a hot car (above 95°F/35°C) or freezing garage (below 32°F/0°C) degrades the battery faster and can cause charging failures.
If storing the console for an extended period, charge it to around 50-60% before putting it away. A fully charged or fully depleted battery degrades faster in storage. Check it every few months and top it off if needed.
Keep the console in a case when traveling. This protects the USB-C port from debris and prevents accidental damage from drops or pressure. Hard-shell cases are better than soft pouches for frequent travelers.
When to Contact Nintendo Support or Seek Professional Repair
Some problems are beyond user fixes. If the console still won’t charge after trying everything above, it’s time to escalate.
Warranty Coverage and Repair Options
Nintendo offers a 12-month limited warranty on new consoles, covering defects in materials and workmanship. If the Switch is less than a year old and hasn’t been physically damaged or modified, Nintendo should repair or replace it for free.
Out-of-warranty repairs cost between $100-$150 USD depending on the issue. Battery replacements, port repairs, and motherboard work all fall in that range. Nintendo’s official repair turnaround is typically 1-2 weeks.
Third-party repair shops are an alternative, especially for out-of-warranty units. Shops like uBreakiFix (Asurion) and local electronics repair centers can replace batteries, clean or replace USB-C ports, and diagnose power circuit issues. Prices vary, but they’re often faster than Nintendo’s mail-in service.
Before sending the console anywhere, back up save data to the cloud (requires Nintendo Switch Online) or transfer it to another Switch. Repairs sometimes involve replacing the motherboard, which wipes local saves.
Players who’ve invested in top accessories and games know the value of keeping the console in working order. A $100 repair is worth it compared to replacing the entire system and library.
Conclusion
Charging issues are frustrating, but they’re usually solvable. Most cases trace back to a faulty cable, dirty port, or depleted battery that needs time to recover. Working through the diagnostics and troubleshooting steps in order eliminates the guesswork and gets the console back online faster.
For players who’ve tried everything and still see no results, professional repair is the next step. Whether through Nintendo or a trusted third-party shop, fixing a charging problem is almost always cheaper than replacing the console. And with proper care, clean ports, quality cables, and mindful storage, future issues become a lot less likely. The Switch is built to last, but like any portable device, it needs a little attention to stay in fighting shape.