Table of Contents
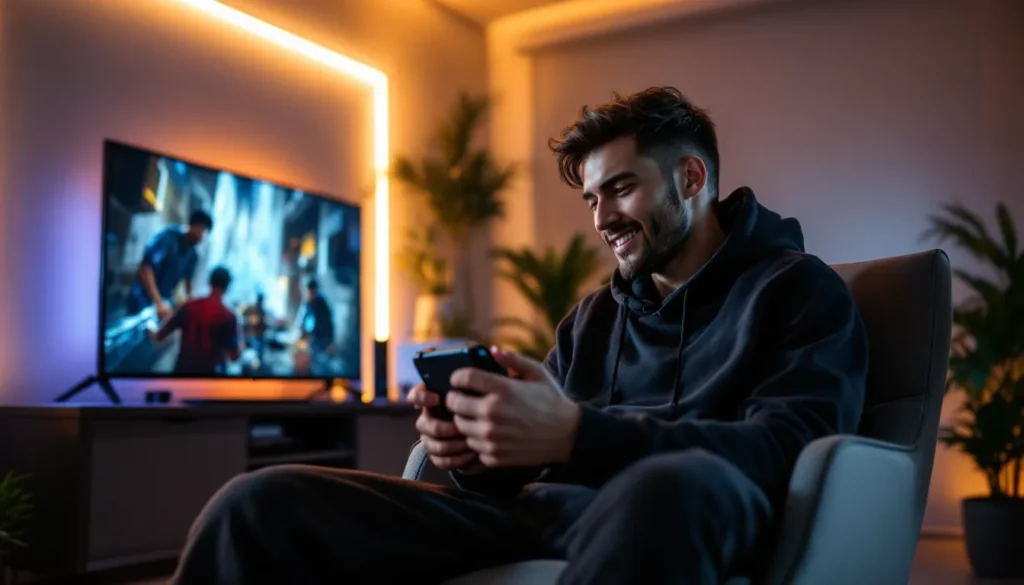
ToggleThe Switch looks great on a TV, but the setup itself? That’s a different story. Cables everywhere, a dock sitting awkwardly on a shelf, and a display that doesn’t quite mesh with the rest of the living room. That’s where a TV frame comes in, not just for decoration, but to make the entire gaming space feel deliberate and polished.
TV frames designed for gaming setups have evolved significantly in 2026, with options ranging from sleek minimalist designs to custom-built solutions that integrate cable management, ventilation, and even RGB lighting. Whether someone’s playing Tears of the Kingdom in 4K or grinding ranked matches in Splatoon 3, the right frame can turn a functional setup into a showpiece without sacrificing performance or accessibility.
Key Takeaways
- A Nintendo Switch TV frame improves both aesthetics and functionality by integrating the console into living room decor while managing cables and protecting the display.
- Pre-made frames cost $150–$600, DIY solutions run under $100, and custom builds start at $800, offering options for any budget and skill level.
- Proper ventilation is critical to prevent heat buildup; choose frames with spacers or mesh backing panels, especially for wall-mounted TVs during extended gaming sessions.
- Measure TV bezels precisely and check frame depth compatibility with your wall mount type to avoid installation issues and maintain proper airflow.
- Popular Nintendo Switch TV frame options include Deco TV Frames for cable management, Frame My TV for classic aesthetics, and custom AV solutions for dedicated gaming rooms.
- Regular maintenance—dusting, inspecting adhesive or magnetic attachments quarterly, and refreshing cable organization—keeps your frame and setup looking sharp year-round.
What Is a Nintendo Switch TV Frame?
A Nintendo Switch TV frame is a decorative or functional enclosure that surrounds the television used for gaming. Unlike traditional picture frames, these are designed to accommodate modern flatscreen TVs while integrating with gaming hardware like the Switch dock, HDMI cables, and external audio systems.
Most TV frames attach directly to the wall mount or TV stand, creating a border that can range from simple black bezels to ornate wooden or metal designs. Some models incorporate built-in cable channels, LED backlighting, or modular sections that allow for custom configurations based on room layout and aesthetic preferences.
The concept isn’t entirely new, home theater enthusiasts have used similar solutions for years, but the gaming community’s adoption of TV frames has accelerated thanks to the Switch’s popularity as both a portable and docked console. With over 140 million units sold worldwide as of early 2026, more players are investing in permanent docked setups that deserve better presentation than a bare TV on a stand.
Why Use a TV Frame for Your Nintendo Switch?
Enhanced Aesthetics and Living Room Integration
Gaming setups often clash with living room decor, especially when shared spaces need to serve multiple purposes. A well-chosen TV frame bridges that gap, making the display look intentional rather than out of place. Wood-finish frames can match existing furniture, while minimalist metal designs complement modern interiors.
The Switch’s hybrid nature means many players keep their dock connected permanently, which makes aesthetic integration even more important. A frame can visually unify the TV, soundbar, and surrounding shelves into a cohesive entertainment center rather than a collection of disparate tech.
Beyond matching decor, frames create visual boundaries that help define the gaming space. This matters in open-concept living areas where the TV isn’t the room’s only focal point. Strategic use of lighting or textured frames draws attention when gaming and blends into the background when the screen’s off.
Protection and Cable Management
TV frames aren’t just cosmetic, they serve practical functions that improve the gaming experience. Cable management channels built into quality frames keep HDMI cables, power cords, and ethernet lines organized and out of sight. This reduces clutter and prevents the accidental disconnections that happen when cables dangle freely.
Protection is another benefit, particularly for wall-mounted setups. Frames add a physical barrier that can prevent minor impacts or scratches to the TV bezel. Some models include dust guards or ventilated backing panels that keep the display cleaner while maintaining airflow for heat dissipation.
For households with kids or pets, frames provide an extra layer of security. They make the TV feel more permanent and less prone to being bumped or tilted, which matters when expensive gaming hardware sits directly below the screen.
Types of Nintendo Switch TV Frames Available
Traditional Picture Frames for TV Displays
These are pre-made frames designed to fit standard TV sizes, typically ranging from 43 inches to 75 inches. Brands like Deco TV Frames and Frame My TV offer collections in wood, metal, and composite materials that attach via magnetic strips or adhesive mounts.
Traditional TV frames work well for renters or anyone who wants a quick aesthetic upgrade without permanent modifications. They’re easy to install and remove, with most models attaching in under 30 minutes using included hardware. Prices range from $150 to $600 depending on size and material quality.
The downside is limited customization. These frames come in fixed dimensions and finishes, so finding an exact match for specific decor can be challenging. They also typically don’t include advanced features like integrated cable management or lighting, though some higher-end models offer add-on accessories.
Custom-Built Gaming Display Frames
Custom frames are built to exact specifications, often by local carpenters or specialized companies that cater to home theater and gaming setups. These solutions integrate directly with wall mounts, media consoles, and even Nintendo Switch accessories for a truly unified look.
The advantage is total control over materials, dimensions, and features. Builders can incorporate recessed sections for the Switch dock, ventilated panels for heat management, or RGB lighting synchronized with on-screen action. Custom frames can also match room dimensions precisely, which matters for built-in entertainment centers or alcove installations.
Cost is the main barrier, custom work typically starts around $800 and can exceed $2,000 for complex builds. Lead times can stretch several weeks, especially for handcrafted designs. But for dedicated gaming spaces or high-end setups, the investment pays off in both aesthetics and functionality.
DIY Frame Solutions
DIY frames appeal to gamers who want customization without custom pricing. Common approaches include repurposing large picture frames from craft stores, building frames from lumber and corner molding, or 3D-printing modular frame segments that snap together.
Tutorials on How-To Geek and similar sites walk through basic builds using materials from home improvement stores. A simple wooden frame for a 55-inch TV can cost under $100 in materials, with construction taking a weekend for someone comfortable with basic tools.
The challenge is achieving professional-looking results. DIY frames require precise measurements, proper anchoring to avoid sagging, and careful finishing to match existing furniture. Ventilation and cable routing need to be planned from the start, which adds complexity compared to buying a ready-made solution.
Best TV Frames Compatible with Nintendo Switch Displays
Compatibility depends on TV size and setup style, but several frames stand out for gaming applications in 2026.
Deco TV Frames – Modern Wood Series: Available in oak, walnut, and espresso finishes for TVs from 43 to 75 inches. These use magnetic mounting brackets that don’t interfere with VESA wall mounts, making them ideal for players who frequently adjust screen position. Pricing starts at $180 for smaller sizes. The frames include cable channels along the sides, though they don’t route behind the display itself.
Frame My TV – Designer Collection: Higher-end option with ornate profiles that mimic traditional picture frames. Sizes run from 50 to 85 inches, with prices from $400 to $700. These work best for formal living rooms or dedicated gaming lounges where the aesthetic leans classic rather than tech-forward. No integrated lighting, but the deeper profile accommodates soundbar placement without visual obstruction.
Samsung The Frame Bezel Kits: While designed for Samsung’s The Frame TVs, these magnetic bezels fit most flatscreens with minor modifications. Available in white, beige, brown, and black. They’re thinner than traditional frames, which suits minimalist setups. Players using the Switch primarily in docked mode appreciate the clean look that doesn’t compete with game visuals. Runs about $200 for 55-inch sets.
Custom AV Solutions Pro Frame: Sold through specialized AV installers, these frames integrate with smart home systems and include options for motorized cable management, ambient lighting, and ventilated panels. They’re overkill for casual setups but make sense for dedicated gaming rooms with multiple consoles. Expect $1,200+ installed.
For players exploring Switch setup optimization, the frame choice often depends on whether portability matters. Those who primarily dock the console benefit from heavier, more permanent frames with better cable integration, while players who frequently undock might prefer lighter, tool-free mounting systems.
How to Choose the Right TV Frame for Your Nintendo Switch Setup
Screen Size and Frame Dimensions
Measure the TV’s outer bezel, not just the screen size listed in specs. A “55-inch” TV might measure 49 inches wide and 28 inches tall with bezels included, and frame compatibility depends on those exact dimensions. Most manufacturers provide sizing charts, but double-checking measurements prevents returns.
Frame depth matters for wall-mounted setups. Frames deeper than 2 inches can interfere with articulating wall mounts or create awkward gaps between the wall and TV. Shallow frames (under 1 inch) work better for tilting or swiveling mounts, which some players prefer for reducing glare during bright scenes in games like Metroid Prime 4.
Oversizing intentionally can work for aesthetic purposes, adding 2-3 inches to each dimension creates a gallery-style presentation that emphasizes the display. But this requires centered mounting and doesn’t suit tight spaces where every inch counts.
Material and Build Quality Considerations
Wood frames offer the widest variety of finishes and can be stained or painted to match existing furniture. Solid hardwood (oak, maple, walnut) lasts longer than MDF or composite materials but costs significantly more. For gaming setups subject to humidity changes from extended console use, solid wood’s dimensional stability prevents warping.
Metal frames, typically aluminum or steel, suit modern or industrial aesthetics. They’re lighter than wood, which simplifies wall mounting and reduces strain on TV brackets. Black powder-coated aluminum is particularly popular for setups featuring RGB lighting, as the dark frame enhances color contrast without visual competition.
Composite and foam-core frames cost less and weigh even less, making them ideal for renters or temporary setups. Durability suffers, though, and cheaper materials can look obviously fake in well-lit rooms. For spaces where gaming accessories and peripherals already crowd shelves, a lightweight frame simplifies rearrangement without heavy lifting.
Ventilation and Heat Management
The Switch dock generates modest heat, but TVs produce significantly more, especially during extended gaming sessions. Frames that fully enclose the TV’s back panel can trap heat and reduce component lifespan. Look for frames with ventilated backing, open tops and bottoms, or mesh panels that allow airflow.
Wall-mounted setups need extra attention to ventilation. Frames that sit flush against the wall restrict airflow more than those with spacers or standoffs. Dedicated gaming setups running 4+ hours daily should prioritize frames with at least 1 inch of clearance behind the TV for passive convection.
Some premium frames include active ventilation, small fans built into the frame structure that exhaust warm air. These are rare and add cost, but they’re worth considering for enclosed entertainment centers or setups with poor ambient airflow. Noise is usually negligible compared to console fan noise during intensive games.
Step-by-Step Installation Guide for Nintendo Switch TV Frames
Preparing Your TV and Gaming Space
Start by clearing the area around the TV and disconnecting all cables, power, HDMI, audio, and ethernet. This prevents accidental damage during frame installation and provides access to mounting points. Take photos of the cable configuration before disconnecting anything: this speeds up reconnection and prevents mistakes with multiple HDMI devices.
Clean the TV bezel thoroughly with microfiber cloths and screen-safe cleaner. Adhesive-mounted frames won’t adhere properly to dusty or greasy surfaces, and magnetic frames can trap debris between the frame and TV if not cleaned first. Pay special attention to corners where dust accumulates.
Check the wall mount or stand for stability. Installing a frame adds weight, usually 5 to 15 pounds depending on size and material. Wall mounts should be secured to studs, not just drywall anchors, especially for frames over 10 pounds. Stands should be level and have adequate load capacity for the combined weight of TV and frame.
Mounting and Securing the Frame
For adhesive-mounted frames, apply mounting strips to the frame’s inner edges following manufacturer spacing guidelines. Press firmly for 30 seconds per strip, then wait the recommended cure time (usually 24 hours) before attaching to the TV. Rushing this step causes frames to sag or detach over time.
Magnetic frames use steel strips adhered to the TV bezel with the frame attaching via embedded magnets. Position the steel strips carefully, they’re difficult to reposition once pressed down. Align the frame pieces to the strips and verify even gaps on all sides before finalizing placement. Magnetic systems allow easy removal but can shift if bumped, so they work best for wall-mounted TVs away from foot traffic.
Screw-mounted frames attach through existing VESA mount holes or dedicated bracket systems. These provide the most secure attachment but require drilling or using existing threaded inserts on the TV’s back panel. Follow torque specifications to avoid over-tightening, which can crack TV housings or strip threads. Reviews on RTINGS often detail TV build quality, which helps gauge how much mounting force is safe.
Connecting Your Nintendo Switch Dock
Once the frame is secured, route cables through any integrated channels or clips. Run the HDMI cable from the Switch dock to the TV first, then power and any additional cables. Leave slight slack at connection points to prevent strain when adjusting the TV position.
Position the Switch dock within easy reach but out of direct sight if possible. Many setups place the dock on a shelf directly below the TV or in an adjacent media cabinet. For wall-mounted TVs, consider a floating shelf that aligns with the frame’s bottom edge, it creates visual continuity and keeps the dock accessible for inserting game cartridges.
Test the full connection before finalizing cable management. Boot the Switch, verify video output, and check that USB accessories (controllers, ethernet adapters) work correctly. This catches any loose connections before cables are bundled and tied down. Proper Switch configuration includes setting the TV resolution to automatic in System Settings > TV Output, which ensures optimal picture quality across different displays.
Creative Design Ideas for Gaming-Themed TV Frames
Gaming-themed frames go beyond basic borders, incorporating elements that reflect favorite franchises or gaming aesthetics.
Franchise-Inspired Designs: Custom frames can integrate motifs from Nintendo’s major franchises. Zelda-themed frames might use Hylian crest engravings or Sheikah Slate-inspired patterns. Mario fans often incorporate question block corner pieces or pixel-art borders in 8-bit style. These work best as subtle nods rather than overwhelming the display, small details in the frame molding or corner accents that reward close inspection.
RGB and Ambient Lighting: LED strips installed behind the frame create ambient backlighting that enhances immersion during gameplay. Philips Hue Play bars or generic RGB strips can sync with on-screen action using HDMI capture devices, though this requires additional hardware and configuration. Static lighting, warm white for relaxed gaming, cool blue for competitive sessions, works just as well without the complexity.
Modular and Swappable Panels: Some players build frames with interchangeable corner pieces or side panels that swap out seasonally or for specific games. Magnetic attachment systems make swapping quick, letting the frame match Splatoon 3 aesthetics during Splatfests or shift to Animal Crossing pastels for relaxed sessions. This requires planning during the initial build but offers long-term flexibility.
Material Mixing: Combining materials creates visual interest, wood frames with metal corner brackets, acrylic panels with LED edge lighting, or fabric-wrapped sections that dampen sound reflections. Mixed-material frames pair well with creative Switch ideas that extend theming beyond the TV to controllers, docks, and storage solutions.
Retro Console Aesthetics: Frames styled after classic consoles (NES, SNES, N64) appeal to longtime Nintendo fans. Gray textured finishes, accent colors matching original hardware, or incorporated controller port details create nostalgia without sacrificing modern functionality. These work particularly well in dedicated game rooms with other retro decor.
Troubleshooting Common TV Frame Issues
Frame Sagging or Shifting: Happens when adhesive mounts lose strength or magnetic systems can’t support the frame’s weight. For adhesive failures, clean both surfaces with isopropyl alcohol and apply fresh mounting strips rated for the frame’s weight. Magnetic frames might need additional steel strips or stronger magnets, particularly on frames exceeding 10 pounds.
Gaps or Uneven Borders: Usually caused by imprecise measurements or TV bezel irregularities. Shim the frame at attachment points using thin foam pads or adhesive felt strips to level the frame against uneven surfaces. For significant gaps, verify the frame is the correct size, some TVs have asymmetric bezels that require custom-cut frames.
Heat Buildup: If the TV or dock runs hotter than before frame installation, airflow is restricted. Remove any backing panels that block ventilation, add spacers to increase clearance behind the TV, or drill ventilation holes in the frame’s top and bottom edges. Heat issues rarely damage the Switch itself (it has robust thermal management) but can shorten TV component life.
Cable Visibility: Cables showing around the frame edges ruin the clean aesthetic. Use cable raceways or channels that match the frame color to route cables along the back of the TV or down the wall. For wall-mounted setups, in-wall cable management kits route cables behind drywall for completely hidden runs, though this requires cutting and patching.
Interference with Wall Mount Adjustments: Some frames restrict access to tilt or swivel adjustment levers on wall mounts. This often requires partial frame removal to adjust, which defeats the purpose of articulating mounts. Solutions include choosing frames specifically designed for articulating mounts, switching to fixed mounts if adjustment isn’t critical, or using frames with tool-free magnetic attachment that comes off in seconds.
Compatibility with Soundbars: Soundbars placed directly below the TV can conflict with frame dimensions, blocking speakers or creating visual clutter. Measure soundbar height and frame depth before purchasing to ensure clearance. Wall-mounting the soundbar separately or choosing frames with recessed bottom edges solves most conflicts. Players focused on Switch gaming peripherals often coordinate soundbar placement with frame installation rather than treating them as separate projects.
Maintaining and Cleaning Your TV Frame Setup
Regular maintenance keeps frames looking sharp and prevents damage from dust accumulation or environmental factors.
Dusting and Surface Cleaning: Use microfiber cloths for weekly dusting. Wood frames benefit from furniture polish every few months to maintain finish and prevent drying or cracking. Metal frames only need occasional wiping with a damp cloth, avoid abrasive cleaners that can scratch powder coating. For textured or carved frames, soft-bristle brushes reach details that cloths miss.
Checking Mounting Security: Inspect adhesive or magnetic attachments quarterly, especially in humid environments or areas with temperature swings. Look for separation at corners or edges, which indicates weakening adhesion. Tighten any screws or brackets on screw-mounted frames, as vibration from heavy bass or subwoofer use can gradually loosen hardware.
Cable Management Refresh: Cables can work loose or become disorganized over time, particularly if consoles are frequently disconnected for travel. Every few months, verify all connections are secure and re-bundle any cables that have come loose from clips or ties. This prevents tripping hazards and maintains the clean appearance that motivated installing a frame in the first place.
Updating for New Hardware: Console upgrades or display changes might require frame modifications. The Switch’s backward compatibility means the same dock works across all models, but future Nintendo hardware could change dock dimensions. Plan for modular frames or attachment systems that accommodate hardware changes without complete replacement.
Seasonal Adjustments: Wood frames can expand or contract with humidity changes, potentially affecting fit. In dry winter months, wood may shrink slightly, creating gaps: humid summers can cause swelling. Solid hardwood handles this better than composite materials, but all wood frames benefit from climate-controlled environments. For setups in basements or other high-humidity areas, consider metal or composite frames that don’t react to moisture.
Community discussions on Nintendo Life and similar forums often share long-term frame experiences, including maintenance tips specific to certain brands or materials. These real-world reports reveal issues not obvious from manufacturer specs, like how certain finishes hold up to sunlight exposure or how easily frames scratch during cleaning.
Conclusion
TV frames transform a functional gaming setup into something worth showing off. They integrate the Switch’s docked experience into living spaces without compromising performance or accessibility, whether through simple aesthetic upgrades or comprehensive custom builds with lighting and cable management.
The right frame depends on budget, space constraints, and how much customization matters. Pre-made frames offer quick results for under $200, DIY builds provide hands-on customization around $100, and custom installations deliver showroom quality for $1,000+. All three approaches work, it’s about matching the solution to the setup’s purpose and the player’s preferences.
As Switch libraries grow and docked gaming remains popular through 2026 and beyond, investing in a proper frame makes sense for anyone who values their gaming space. The console deserves better than sitting on a crooked shelf next to a tangle of cables, and the right frame delivers that upgrade without requiring a complete room redesign.