Table of Contents
ToggleThe motherboard is the heart of any Nintendo Switch, but it’s also the most complex and expensive component to deal with when things go wrong. Whether you’re troubleshooting a bricked console, considering a DIY repair, or just curious about what makes your Switch tick, understanding the motherboard is essential. Unlike replacing Joy-Cons or swapping out a battery, motherboard issues require precision, patience, and the right knowledge, especially in 2026, when repair parts availability and third-party options have evolved significantly since the console’s 2017 launch. This guide breaks down everything you need to know about Switch motherboards across all three models, from diagnosing failures to executing a full replacement.
Key Takeaways
- The Nintendo Switch motherboard contains the Tegra X1 SoC and critical power management chips, making component-level diagnosis essential before committing to expensive repairs or replacements.
- Original, OLED, and Lite Switch models use incompatible motherboards with different layouts and features, so verify your exact model (HAC-001, HAC-001-01, HEG-001, or HDH-001) before sourcing replacement parts.
- Common motherboard failures stem from the M92T36 power management IC and BQ24193 fuel gauge IC, which can often be repaired for $50–$100 instead of replacing the entire $100–$150 motherboard.
- Full motherboard replacement requires careful disassembly, proper thermal paste application, and ribbon cable management—DIY saves $50–75 but carries high risk of damaging delicate connectors or the LCD display.
- Using only official or USB-IF certified chargers, avoiding extreme temperatures, and keeping liquids away from the console prevent the majority of motherboard failures and extend your Switch’s lifespan.
- Nintendo’s official out-of-warranty motherboard repair costs $108–135 and preserves save data through cloud backup, making it the safest option for most players over DIY or third-party repair risks.
What Is a Nintendo Switch Motherboard and Why Does It Matter?
The Nintendo Switch motherboard (officially called the logic board) is the central PCB that houses the NVIDIA Tegra X1 SoC, RAM, storage, and all critical circuitry. Think of it as the brain and nervous system combined, it manages everything from processing game data to coordinating power distribution, video output, and wireless connectivity.
When the motherboard fails, the entire console becomes unusable. No amount of Joy-Con swapping or dock troubleshooting will fix a dead logic board. That’s why diagnosing motherboard issues early matters, it’s the difference between a $15 capacitor fix and a $200+ replacement.
Key Components on the Switch Motherboard
The Switch motherboard is densely packed with specialized chips and circuits. Here’s what actually lives on that green PCB:
- NVIDIA Tegra X1 SoC: The CPU and GPU combined into one chip. Handles all game processing and graphics rendering. Clocked at 1.02 GHz docked, 768 MHz handheld.
- 4GB LPDDR4 RAM: Samsung or Hynix chips soldered directly to the board. Can’t be upgraded.
- 32GB eMMC NAND storage: Built-in flash memory. Also soldered, so storage expansion requires microSD cards.
- Power Management IC (PMIC): The M92T36 chip controls power delivery to all components. One of the most common failure points.
- Fuel Gauge IC: Monitors battery health and charge levels. The BQ24193 chip is notorious for causing charging issues.
- USB-C port controller: The CYPD5225 manages USB Power Delivery and data transfer.
- Wi-Fi/Bluetooth module: Broadcom chip handling all wireless connectivity.
- Display controller and HDMI encoder: Manages the LCD in handheld mode and video output to TV.
Each of these components can fail independently, but diagnosing which specific chip is at fault requires microsoldering equipment and a logic board schematic. That’s why most repair services focus on full motherboard replacement rather than component-level fixes.
Differences Between Original Switch, OLED, and Lite Motherboards
Nintendo has released three distinct Switch models since 2017, and each uses a different motherboard design. They’re not interchangeable, so knowing which version you have matters for repairs and part sourcing.
Original Nintendo Switch Motherboard Specifications
The original Switch launched in March 2017 with model number HAC-001. The motherboard features the full NVIDIA Tegra X1 with no CPU revision, measuring approximately 136mm x 40mm.
Key specs:
- Tegra X1 T210 (20nm process)
- Supports both docked and handheld modes
- USB-C port for charging and dock connection
- Full-size game card slot
- Dual rail cooling system contact points
In 2019, Nintendo released a revised model (HAC-001(-01)) with the Tegra X1+ (Mariko) chip. This revision uses a 16nm process, runs cooler, and delivers significantly better battery life. The motherboards look similar but use different power management configurations, so they’re not directly swappable without firmware modifications.
OLED Model Motherboard Upgrades and Changes
The Switch OLED (model HEG-001) launched in October 2021 with a redesigned motherboard that’s roughly 20% smaller than the original even though adding features.
Notable changes:
- Modified layout to accommodate larger battery
- Improved thermal design with repositioned heat pipe
- Enhanced audio codec for better speaker quality
- New LAN port controller for wired Ethernet in dock
- Same Tegra X1+ (Mariko) as 2019 revision
The OLED motherboard isn’t compatible with standard Switch chassis due to different screw mounting points and connector locations. Gaming hardware specialists at Tom’s Hardware have documented the internal redesign extensively in their teardown coverage.
Switch Lite Motherboard Design and Limitations
The Switch Lite motherboard (model HDH-001) is the most compact at roughly 50% the size of the original Switch board. Released in September 2019, it sacrifices TV output capability for portability.
Key differences:
- No video encoder chip, handheld mode only
- Integrated controls instead of detachable Joy-Con connectors
- Single cooling solution (no dock mode heat generation)
- Different power management tuned for always-portable use
- Smaller eMMC storage controller layout
Because the Lite never needs to push 1080p to an external display, Nintendo removed several chips entirely. This makes Lite motherboards cheaper to manufacture but also means you can’t “convert” one to work in a standard Switch even with custom firmware.
Common Nintendo Switch Motherboard Problems and Symptoms
Motherboard failures don’t always mean the entire board is toast. Often, one specific chip or circuit fails while everything else works fine. Recognizing symptoms helps narrow down the issue.
No Power or Boot Issues
The most alarming symptom: pressing the power button does nothing. No logo, no backlight, complete silence.
Typical causes:
- Failed M92T36 power management IC (extremely common)
- Corrupted boot ROM on the NAND storage
- Shorted capacitor near the SoC
- Disconnected or damaged battery connector
Interestingly, the Switch won’t boot even with a charger connected if the fuel gauge IC can’t detect a battery. It’s a safety feature that also creates false alarms when battery connectors corrode.
If the console briefly shows the Nintendo logo then crashes, that usually indicates NAND corruption or failed RAM rather than power delivery issues. Those require advanced data recovery tools that most repair shops don’t have.
Charging Port and Power Management Failures
The USB-C port takes a beating from daily use, but issues here often trace back to the motherboard rather than the port itself.
Common symptoms:
- Slow charging or not charging at all
- Console only works in dock, not with direct USB-C charging
- Overheating near the USB-C port area
- Random battery percentage jumps
The BQ24193 fuel gauge IC fails frequently after liquid damage or voltage spikes from third-party chargers. When it dies, the console might think it’s perpetually at 1% battery even when fully charged. The CYPD5225 USB-C controller can also fail, preventing any charging or data transfer.
Third-party docks caused a wave of bricked Switches in 2018 by sending incorrect power delivery signals. Many of those failures centered on the PI3USB30532 USB switch IC, which routes signals between handheld and docked modes.
Display and Video Output Problems
When the screen stays black but you hear game audio, or when TV output fails in docked mode, display circuitry is usually the culprit.
Display-related failures:
- Backlight works but no image (LCD connector or display controller)
- Image appears but heavily distorted (GPU or VRAM failure)
- No TV output but handheld works (HDMI encoder or dock connector)
- Screen flickers or has lines (damaged LCD flex cable or connector)
True GPU failures are rare because the Tegra X1 is robust, but they do happen after significant drops or liquid damage. When the SoC itself fails, replacement isn’t cost-effective, you’re looking at a full motherboard swap.
The P13USB30532 mentioned earlier also handles video routing. If it fails partially, you might get handheld video but no dock output. Testing requires swapping to a known-good dock before assuming motherboard damage.
How to Diagnose Motherboard Failure on Your Nintendo Switch
Before ordering replacement parts, confirm the motherboard is actually the problem. Many “dead” Switches just need a new battery or charging port.
Visual Inspection for Physical Damage
Start with the obvious stuff. Getting inside requires a Y00 triwing screwdriver and a JIS #000 Phillips head.
What to look for:
- Corrosion: Green or white crusty deposits near any chips or connectors. Liquid damage spreads.
- Burn marks: Brown or black discoloration around components indicates electrical shorts.
- Missing or damaged components: Chips can literally fall off after drops. Check near screw holes especially.
- Lifted pads: Solder points that separated from the PCB. These look like small circles or squares with nothing attached.
- Swollen capacitors: Bulging tops on cylindrical components. Rare on Switch boards but a clear failure sign.
Use a magnifying glass or your phone’s camera in macro mode. Damage that’s invisible to the naked eye shows up clearly at 5x magnification.
If you see corrosion, cleaning with 90%+ isopropyl alcohol and a soft brush might revive the board. Let it dry completely (24+ hours) before testing. But if corrosion has eaten through PCB traces, the tiny copper lines connecting components, the board is likely toast.
Testing Power Delivery and Battery Connection
A USB-C power meter (available for $15-25 on Amazon) tells you exactly what the Switch is drawing. Plug it between your charger and the Switch’s USB-C port.
Normal readings:
- Completely dead battery: 15V at 0.5A initial draw, ramping to 1.5A
- Booting console: Brief spike to 18V at 2-3A
- Idle in handheld mode: 15V at 0.3-0.5A
- Gaming in handheld mode: 15V at 0.8-1.5A depending on title
- Docked mode: 15V at 1.5-2.5A
If the power meter shows 0.0A draw, the console isn’t accepting power at all. That’s either a dead USB-C port, failed M92T36 PMIC, or a short circuit somewhere on the board.
If you see normal amperage but no boot, the power delivery system works, the failure is downstream in the SoC, RAM, or storage. Those scenarios always require professional repair or replacement.
Also disconnect and reconnect the battery connector with power off. Corrosion on those pins causes weird behavior that mimics motherboard failure. Clean the connector with isopropyl alcohol on a cotton swab if you see any discoloration.
Nintendo Switch Motherboard Replacement: What You Need to Know
Swapping a motherboard is the nuclear option for Switch repairs. It works, but it comes with serious tradeoffs.
When Replacement Is Necessary vs. Repair Options
Component-level repair (fixing individual chips) is almost always cheaper than full motherboard replacement, but it requires microsoldering skills that take years to develop.
Repair makes sense for:
- Failed M92T36 PMIC ($5 chip + $50-80 labor)
- USB-C port replacement ($8 part + $40-60 labor)
- Fuel gauge IC replacement ($3 chip + $50-80 labor)
- Disconnected or lifted connector pads ($60-100 labor)
Replacement is necessary for:
- Failed Tegra X1 SoC (not economically repairable)
- Failed RAM chips (requires BGA rework beyond most shops)
- Corrupted or failed NAND storage with no backup
- Extensive corrosion affecting multiple circuits
- Board with cracked PCB or broken traces
Here’s the catch: when you swap motherboards, you lose all save data unless you transfer the NAND chip from the old board to the new one. And NAND transfers require specialized equipment plus firmware knowledge to avoid permanent bans from Nintendo’s online services. According to WCCFTech coverage, Nintendo’s ban detection improved significantly in 2024-2025.
Consider sending to Nintendo for official repair if your console is under warranty or within 2 years of purchase. They charge $100-120 for motherboard replacement in the US as of 2026, and they preserve your save data through cloud backup restoration (requires Nintendo Switch Online subscription).
Cost Comparison: DIY vs. Professional Repair Services
Let’s talk real numbers for 2026:
DIY motherboard replacement:
- Replacement motherboard: $80-150 depending on model and refurb vs. new
- Tools (if you don’t have them): $25-40 for screwdriver set and spudgers
- Total: $105-190
- Time investment: 2-4 hours for first-timers
- Risk: High, easy to damage ribbon cables or connectors
Local repair shop:
- Motherboard replacement labor: $60-100
- Parts markup: Usually 20-40% over your DIY cost
- Total: $150-250
- Turnaround: 3-7 days typically
- Warranty: Most shops offer 30-90 days on parts and labor
Nintendo official repair:
- Flat rate: $100-120 for out-of-warranty motherboard issues
- Shipping: $8-15 to Nintendo repair center
- Total: $108-135
- Turnaround: 7-14 days
- Warranty: 90 days from repair date
- Save data: Preserved if you have NSO cloud backup
The DIY approach saves maybe $50-75 if everything goes perfectly, but there’s no do-over if you crack the LCD or tear a ribbon cable. For most players, the cost savings don’t justify the risk unless they’re already experienced with electronics repair.
If your Switch is one of the early 2017 models vulnerable to exploit, the motherboard has resale value to homebrew enthusiasts, sometimes $100+ for a working board even with minor issues. Check serial number compatibility before scrapping it.
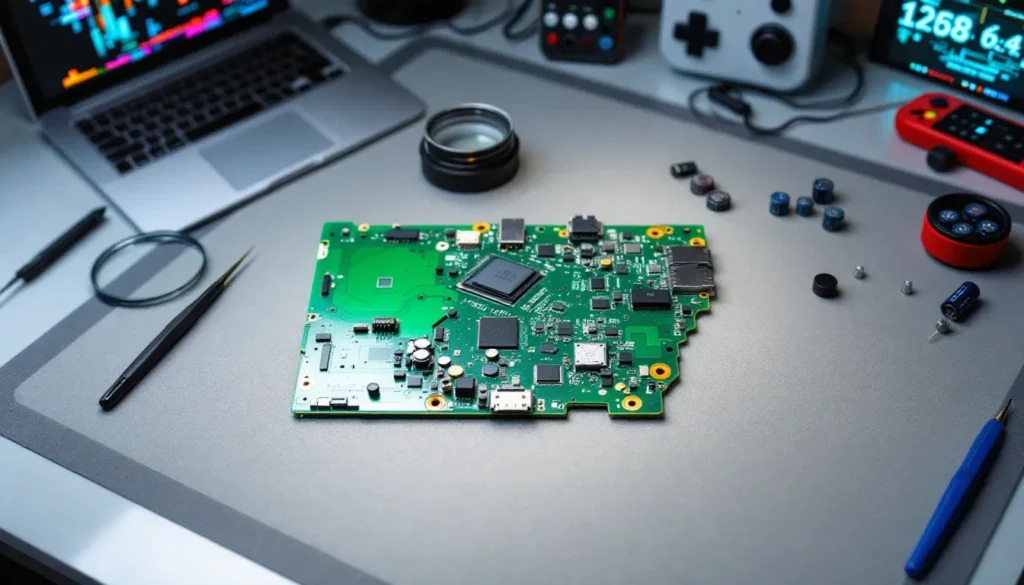
Step-by-Step Guide to Replacing a Nintendo Switch Motherboard
Full disclosure: this is advanced DIY territory. But if you’re committed to doing it yourself, here’s the roadmap.
Tools and Parts Required
Don’t cheap out on tools. Low-quality screwdrivers strip screws, and you’ll turn a repair into a nightmare.
Essential tools:
- Y00 triwing screwdriver (for rear shell screws)
- JIS #000 Phillips screwdriver (NOT regular Phillips, JIS bits fit better)
- Plastic spudgers or opening picks (metal damages plastic clips)
- ESD-safe tweezers
- Anti-static wrist strap or mat
- Thermal paste (for reattaching heatsink to new board)
- Small container for organizing screws
Replacement parts:
- Compatible motherboard for your exact Switch model
- (Optional) New thermal pads if originals are damaged
- (Optional) Replacement battery if yours is degraded
Verify motherboard compatibility carefully. A HAC-001 board won’t work in a HAC-001(-01) housing without modifications, and OLED/Lite boards are completely incompatible with other models.
Disassembly Process and Safety Precautions
Power off completely, not sleep mode. Disconnect any game cards or microSD cards.
Step-by-step disassembly:
- Remove rear shell: Four Y00 triwing screws. Store them separately from other screws.
- Disconnect battery: Use a spudger to carefully pop the battery connector straight up. Don’t pry sideways.
- Remove microSD card reader: Two small JIS #000 screws, then gently pull the reader out.
- Disconnect the game card reader: Flip up the black locking tab, slide the ribbon cable out.
- Remove fan and heatsink assembly: Four screws holding the metal shield, then four more for the heatsink. The thermal paste will resist, twist gently while pulling.
- Disconnect all ribbon cables: LCD, digitizer, speakers, buttons, and Joy-Con rails. Each has a different locking mechanism, most flip up, some slide out.
- Remove motherboard screws: Usually 6-8 small JIS #000 screws around the perimeter.
- Lift motherboard carefully: Check for any cables you missed. The board should come out freely.
Take photos at every step. Your phone’s camera is your best friend for remembering where each connector goes.
Avoid touching chips and components directly. Skin oils attract dust and can cause corrosion over time. Handle boards by the edges.
Installing the New Motherboard and Reassembly
Clean the heatsink’s copper contact surface with 90% isopropyl alcohol before applying new thermal paste. A thin, even layer is all you need, about the size of a grain of rice.
Installation steps (reverse of removal):
- Position new motherboard: Align screw holes carefully. Don’t force it.
- Secure with screws: Tighten in a star pattern to distribute pressure evenly. Don’t overtighten, these are tiny screws in plastic standoffs.
- Reconnect all ribbon cables: Ensure they’re fully seated before closing locking tabs. Partial connections cause intermittent failures.
- Reattach heatsink and fan: Thermal paste should make contact with the SoC. Tighten screws gradually in diagonal pattern.
- Reconnect game card reader and microSD reader: Verify the ribbon cable orientation, they only fit one way but can be forced backward.
- Connect battery last: You should see the charging indicator if everything’s connected properly.
- Test before closing: Power on and verify the console boots before screwing the rear shell back on.
If it doesn’t boot immediately, don’t panic. Try a hard reset by holding the power button for 15 seconds, releasing, then pressing again. Some replacement boards need a full power cycle to initialize.
For players new to hardware repairs, following a comprehensive Nintendo Switch guide can help understand the system’s architecture before attempting internal work.
Where to Buy Replacement Nintendo Switch Motherboards in 2026
Parts sourcing has gotten both easier and sketchier since the Switch’s launch. Here’s where to actually find reliable motherboards:
Trusted sources:
iFixit (ifixit.com): Sells refurbished motherboards with warranties, though stock is inconsistent. Usually $120-150 for tested boards.
AliExpress: Cheapest option at $70-100, but quality varies wildly. Read reviews carefully and check seller ratings above 95%. Shipping takes 2-4 weeks from China.
eBay: Mix of refurbished, pulled, and occasionally new boards. Filter for sellers with 99%+ ratings and at least 500 transactions. Price range $80-140.
Amazon: More expensive ($130-180) but faster shipping and easier returns. Stick to sellers with “Fulfilled by Amazon” for legitimate return policies.
Local game repair shops: Some sell parts directly. Call around, you might pay a bit more but get advice and faster problem-solving.
What to avoid:
- Boards listed as “untested” or “for parts”, they’re broken
- Suspiciously cheap listings ($50 or less), likely scams or boards with failed chips
- Boards without clear photos of both sides
- Sellers who won’t answer questions about board revision or model number
Always verify the board model matches your console exactly. HAC-001, HAC-001(-01), HEG-001, and HDH-001 are NOT interchangeable even though looking similar.
For players exploring trends shaping the Switch ecosystem in 2026, parts availability is becoming a real concern as the console ages.
Preventing Motherboard Damage: Best Practices for Switch Owners
Most motherboard failures are preventable. A few smart habits extend your console’s life significantly.
Use official or certified chargers only. Third-party chargers that don’t properly carry out USB Power Delivery specs have bricked thousands of Switches. Stick to Nintendo’s official AC adapter or USB-C chargers certified by the USB-IF (look for the logo). Anker, RAVPower, and Google chargers are generally safe.
Avoid extreme temperatures. The Switch is rated for 5-35°C (41-95°F) operation. Leaving it in a hot car or playing in direct sunlight causes the SoC to thermal throttle and stresses solder joints. Cold isn’t much better, condensation from bringing a cold Switch into a warm room can cause shorts.
Keep liquids away. Obvious but worth stating: liquid damage is the number one cause of motherboard failure in Switches. Even small amounts of soda or beer can corrode through PCB traces in days.
If liquid gets inside, immediately power off, don’t plug it in, remove the rear shell, disconnect the battery, and let it dry for 48 hours minimum. Cleaning with 90%+ isopropyl alcohol improves survival odds.
Clean the vents regularly. Dust buildup causes overheating, which degrades the SoC and power management chips over time. Use compressed air (short bursts, not sustained spray) every 2-3 months if you play frequently.
Handle with basic care. The Switch is durable but not indestructible. Hard drops can crack solder joints even if the case looks fine. BGA chips like the RAM and SoC have hundreds of tiny solder balls underneath that fracture from impact.
Update firmware through official channels. Custom firmware is fine if you know what you’re doing, but bad CFW installations have bricked countless Switches. Stick to official Nintendo updates unless you’re comfortable with NAND backups and RCM mode.
Use a quality carrying case. One that actually protects, not just holds. Padding prevents drops and keeps the console from getting crushed in bags.
For players just starting out, exploring Nintendo Switch basics helps build good maintenance habits from day one. Understanding how the hardware works makes it easier to spot problems early, often when they’re still fixable with simple cleaning or minor repairs instead of full motherboard replacement.
Conclusion
The Nintendo Switch motherboard is a sophisticated piece of engineering crammed into a compact form factor. When it fails, repair decisions come down to cost, skill level, and how much your save data matters. Component-level repairs save money but require specialized skills. Full motherboard swaps are straightforward but expensive and risk save data loss. Nintendo’s official repair service splits the difference for most players.
Whichever route you choose, diagnosis matters most. Don’t throw money at parts until you’ve confirmed the motherboard is actually the problem. Test power delivery, inspect for obvious damage, and rule out simpler issues like failed batteries or charging ports first. And if you’re not confident with electronics repair, there’s no shame in sending it to professionals, these boards are dense, delicate, and unforgiving of mistakes.